Hubspot
Integration overview
By linking your Hubspot account with Opticks, customers can synchronize leads in both systems and analyze leads generated through Hubspot forms. This way, forms can be enriched using Opticks analysis data, qualify them as valid, suspicious and invalid and see this information embedded in Hubspot. This can improve efficiency and strategies regarding leads management, marketing and sales strategies, and can help make better informed decisions.
Linking your Hubspot account with Opticks
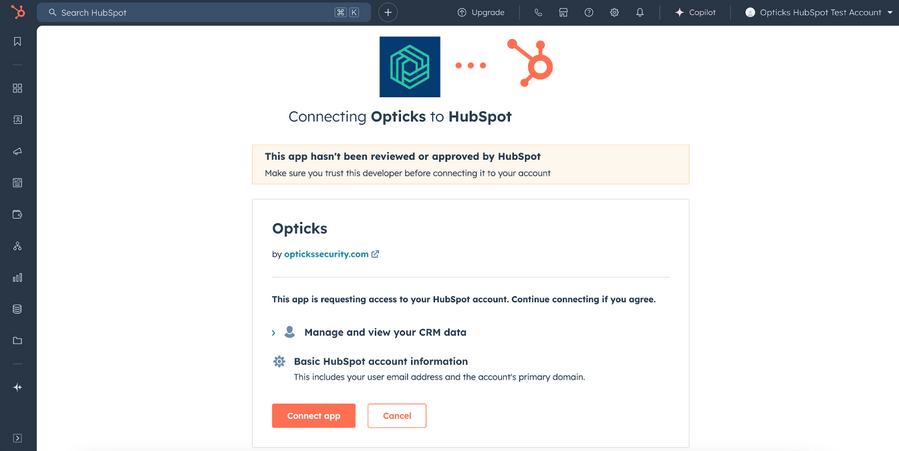
Click in the HubSpot section in the Opticks dashboard. Then click Connect to HubSpot to begin the account linking process. This will lead you to the HubSpot website, asking you to confirm the account linking. You will need to be logged in to HubSpot, and you might also see the following account selection screen if you have multiple HubSpot accounts:

Click on the Connect app button to confirm the linking. After this, you will be brought back to the Opticks app.
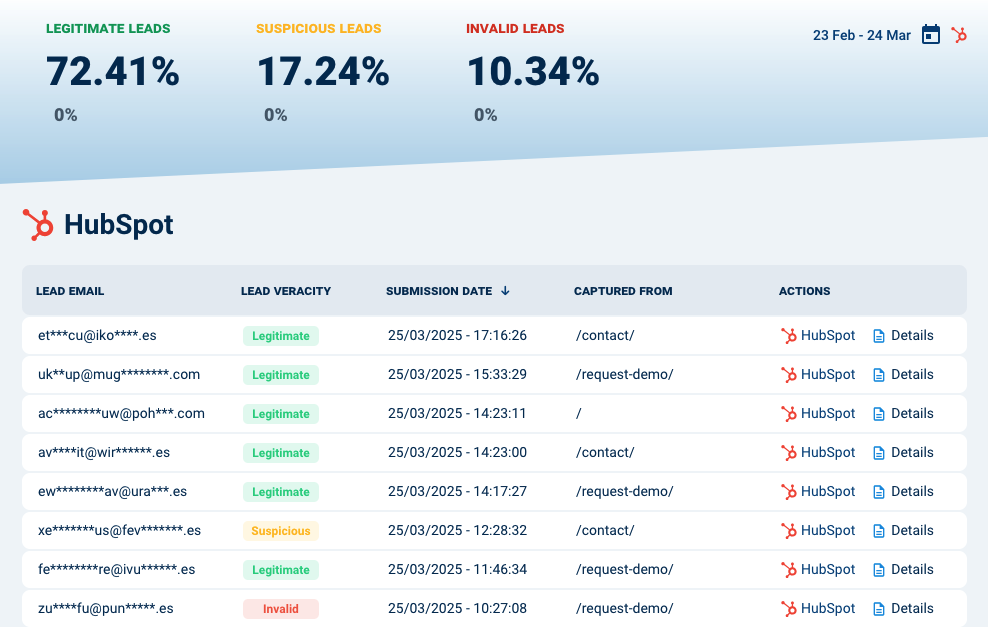
From this point on, Opticks will start automatically enriching HubSpot contacts which are created as a result of form submissions, with the results of their Opticks analysis. Note that this is not retroactive. Details about all contacts that have been enriched will also appear in the HubSpot section inside the Opticks app:
Seeing and using Opticks data from inside HubSpot
Opticks will automatically define custom properties for HubSpot contacts, and start filling in their values when appropriate. However these properties won’t appear by default in most HubSpot views or be used in any way, so you’ll have to configure them according to your wants. Some common use cases are shown below.
The following image shows all the properties that Opticks defines for Contacts inside the HubSpot app:
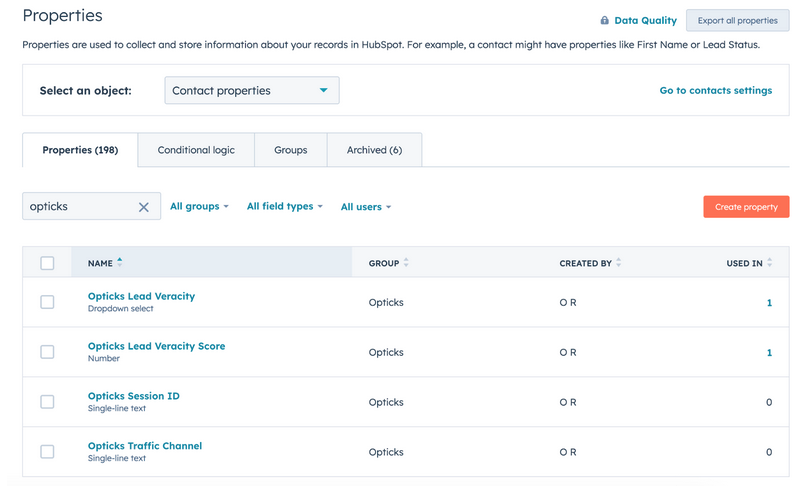
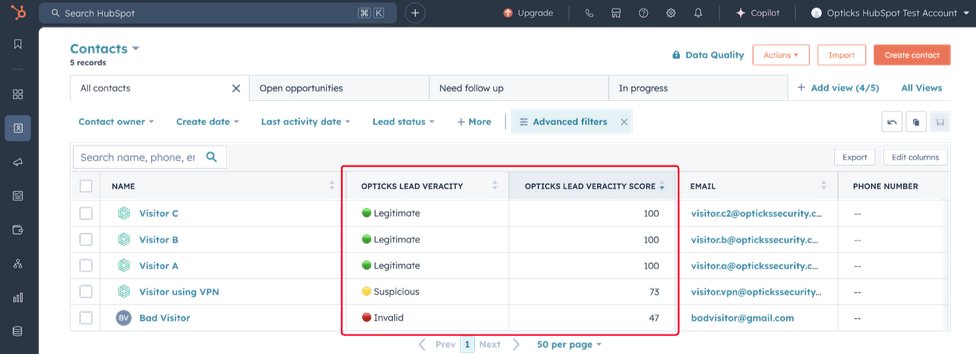
- Opticks Lead Veracity: a textual value that can be either Legitimate, Suspicious or Invalid.
- Opticks Lead Veracity Score: a numeric percentage indicating how good the lead is according to the Opticks analysis. But note that the lead may still be bad due to reasons unrelated to Opticks, such as incentivized traffic or low quality content. This property can be particularly useful for sorting contacts, and its possible values are:
- 100% to 75%: legitimate
- 74% to 50%: suspicious
- 49% to 0%: invalid
- Opticks Traffic Channel: the traffic channel that Opticks detected the visitor comes from, for example: “Google”, “Microsoft”, “Facebook”, “Referral”, “Organic search” or “Direct”
- Opticks Session ID: the identifier of the visitor session inside Opticks for the contact. Typically you won’t want to use this directly.
Showing Opticks data in the Contacts List
You can add Opticks properties to the contact list, which can be useful for example to sort contacts by its score or veracity lead. Usage example:
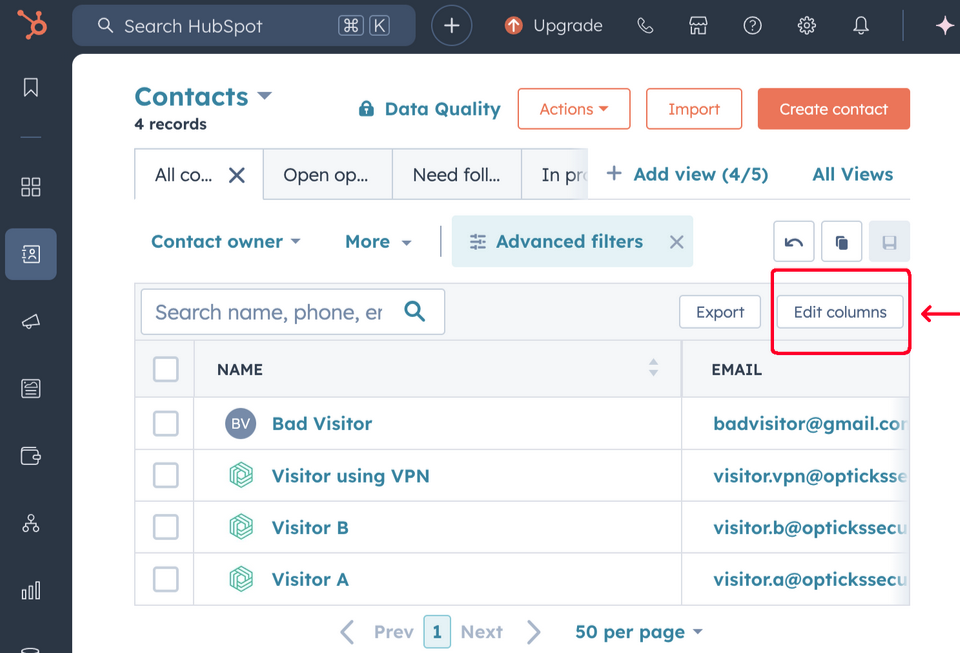
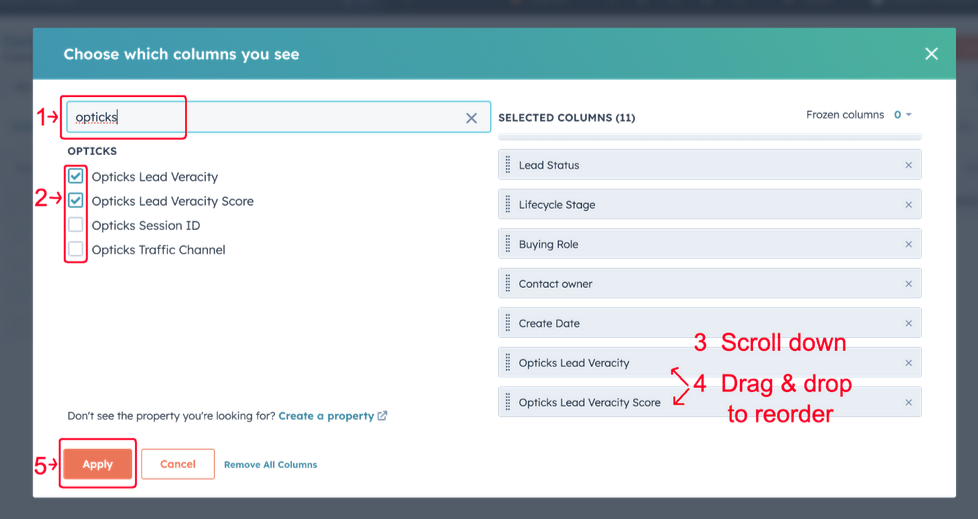
To do this, click on the Edit columns button on the top-right of the table header. You can then search “Opticks” to see the opticks properties, check the ones you want to see, and then drag & drop to reorder them in any order you want them, and finally click on Apply.
Showing Opticks data in Contact Details
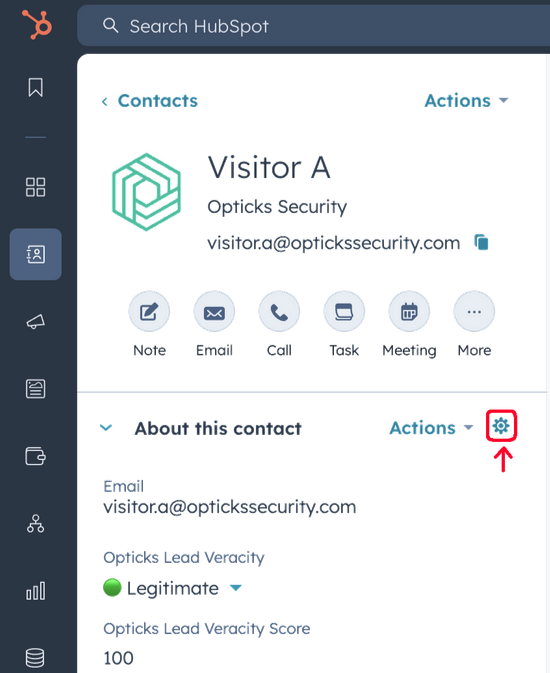
You can also add the properties to the About this contact section which appears on the contact details screen in the left-most panel. Usage example:
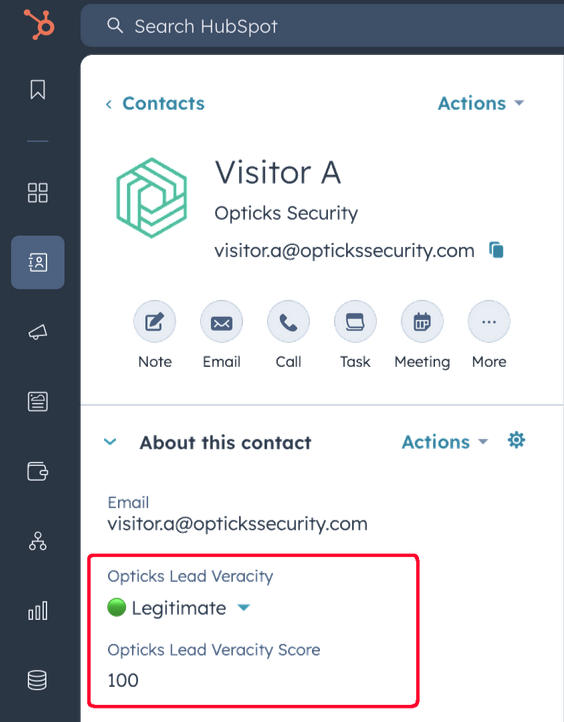
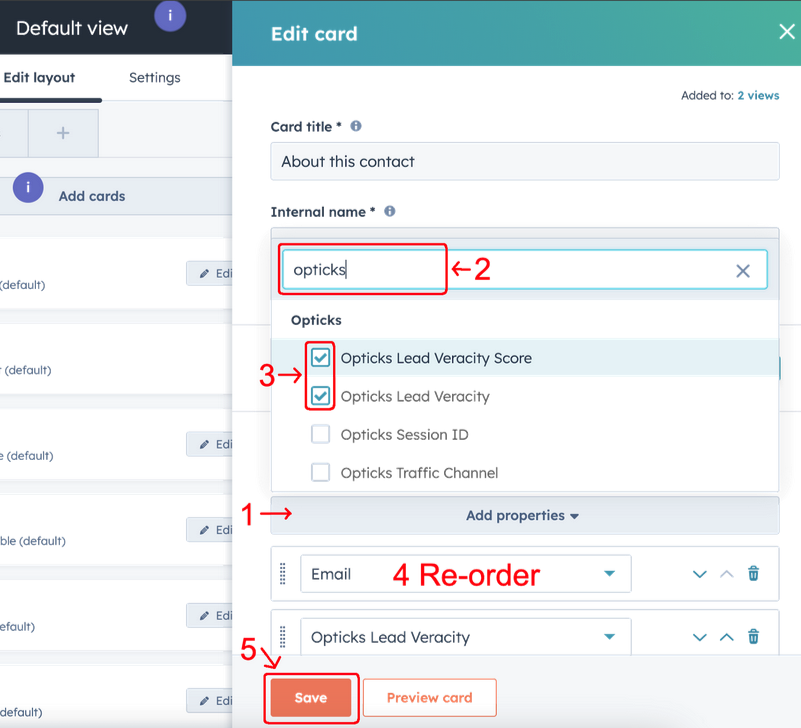
To do this, click on the gear icon at the right of the “About this contact” header. This will open the HubSpot layout editor and specifically the editor for this card as a drawer on the right side. There you can click on the Add properties button, and search for “opticks” and select whichever you want. You may also want to reorder them so they appear higher up. Finally, don’t forget to click Save on the card editor, and then Save and exit again on the layout editor.
Showing the Opticks card in Contact Details
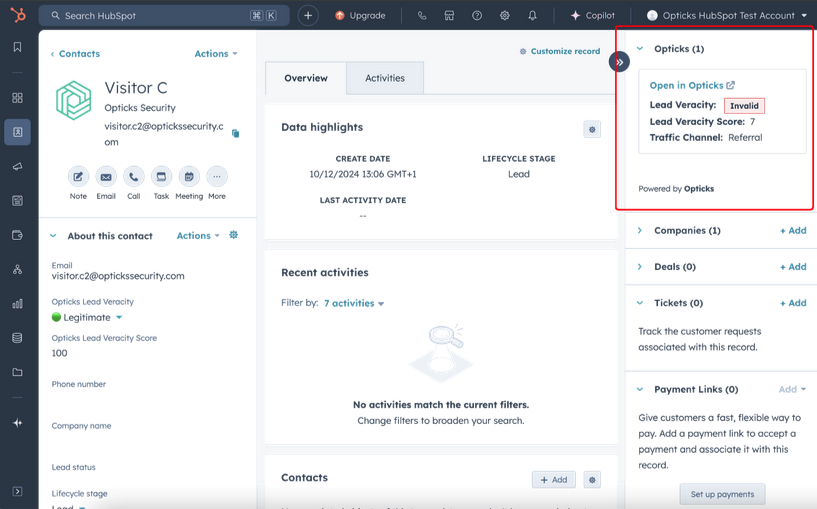
You can also add a pre-built card showing Opticks details to the right-most panel in contact details. This card also includes a link to the visitor session inside the Opticks app corresponding to the contact visit to the page containing the form. Usage example:
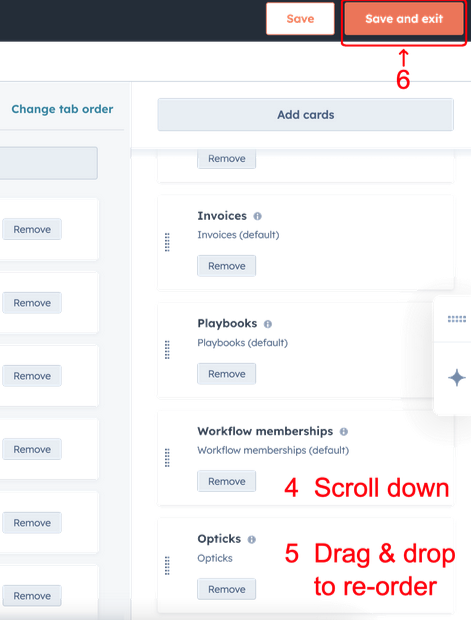
To add this card: click on any gear icon in the contact details page to open the layout editor screen. Close the popup drawer on the right side if any appears, so that you see something like this:
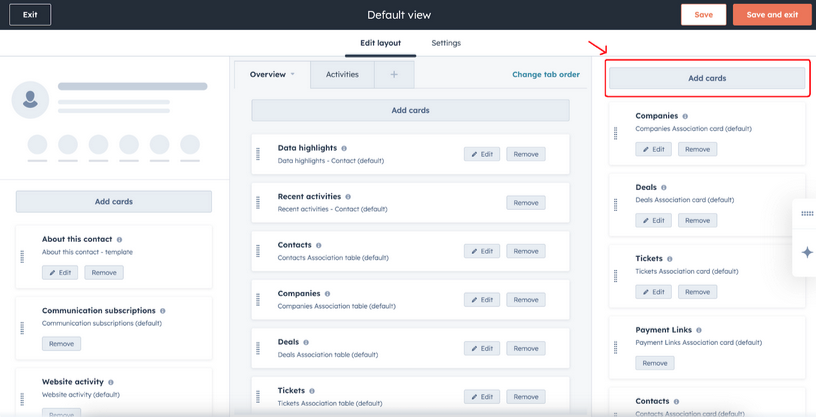
Then, click on the Add cards button on the right-side panel, and search for “opticks”:
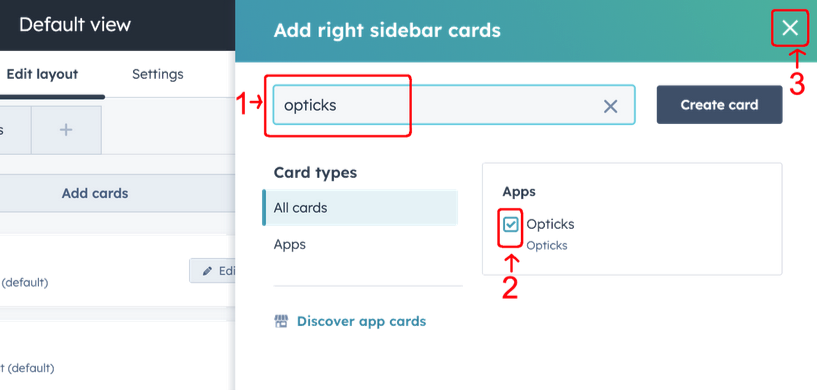
Click on the checkbox of the Opticks card (under Apps on the right) to add it, then click on the X to close this popup. The card will now appear at the bottom of all other existing cards, so you may also want to reorder them by drag & drop so it appears higher up. After done, click Save and exit to close the layout editor.