Integrate Opticks Sensor JS using Google Tag Manager
It's common to use some sort of tool to manage all the javascript snippets from external sources that must be added to a page. One of the most common tools is Google Tag Manager (GTM) and OpticksJS integration is fully compatible with it.
In this article you will find instructions to:
- Install the OpticksJS using GTM
- Inform Opticks about conversion events using solely GTM
- Feed relevant data to Opticks to create custom views in the Analytics section
All the integration shouldn't take more than 5 minutes.
Installing OpticksJS via GTM
The first step to integrate using GTM is to follow the instructions of the Opticks setup.
You can find the setup section in the left panel of the Dashboard:

When opening the integration screen, a dialog asking which integration mode you prefer will appear. Select "I'm using Google Tag Manager" and press next.
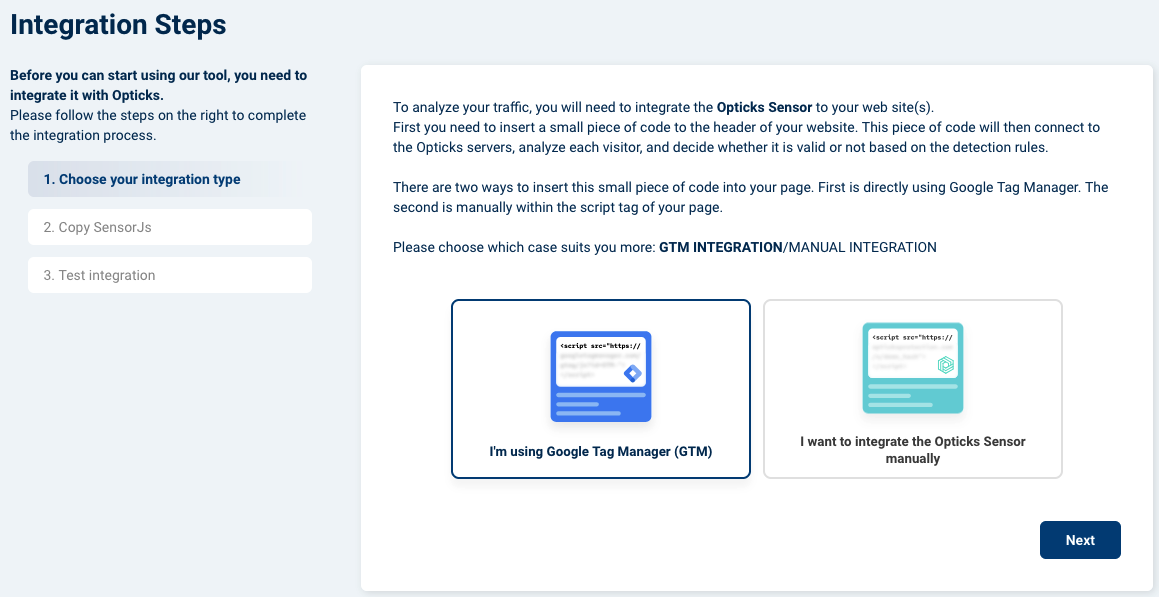
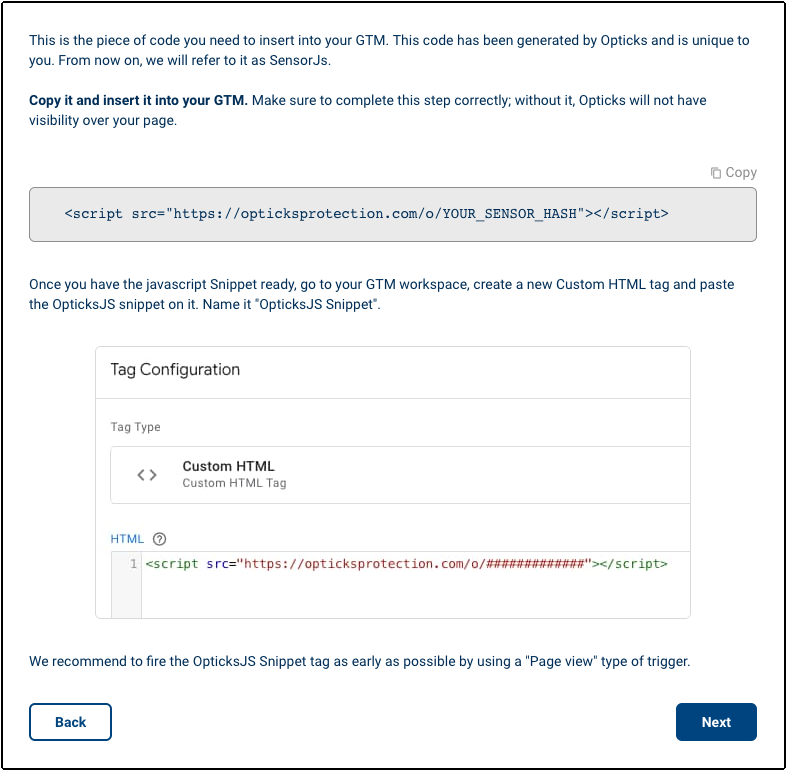
After that, the code snippet for your Opticks SensorJS will appear with the instructions. Just go to your GTM workspace, create a new Custom HTML tag and paste the OpticksJS snippet on it. Name it "OpticksJS Snippet". We recommend to fire the OpticksJS Snippet tag as early as possible by using a "Page view" type of trigger. All these steps are explained in the in-app instructions.
It is important to note that Opticks Sensor JS tag can be triggered before cookies acceptance. To learn more about this, please look at our GDPR site.
Once you have published the GTM changes, press next. You can now make a visit to your page, and press Check Integration.
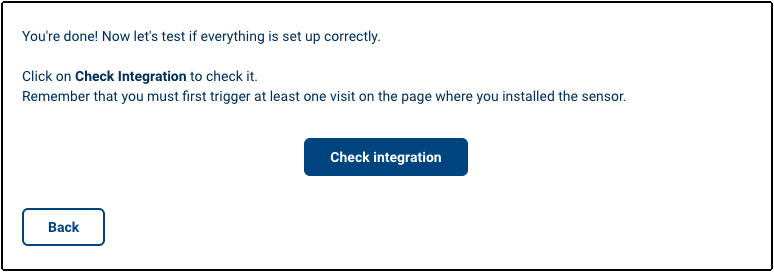
If the setup is correct and Opticks is receiving traffic, the Opticks app will display a success message and you'll be done.
Extra: Adding custom information to the visits
When a visit reaches the landing page where a OpticksJS tag is set. You are able to provide information for segmentation purposes available on a datalayer. To do so, you will have to modify the javascript snippet above to add this information in the four variables available: var1, var2, var3 and var4.
We will assume that you have your information stored in two Data Layer variable called "My Info" and "My other info". In order to report this information to Opticks you need to modify the snippet in the following manner:
<script src="https://opticksprotection.com/o/############?var1={{My Info}}&var2={{My other info}}"></script>
Optional steps
Inform Opticks about conversion events
Now that the OpticksJS Snippet is set, the next step to take is to inform Opticks about conversions. Conversions are actions reported by the customer. It can be any action for which the customer is acquiring traffic, such as leads, form registrations, purchases, etc.
When reporting conversions to Opticks using GTM, you will need to do the following:
Create a new Custom HTML Tag with the following configuration. Name it "Conversion Informing tag".
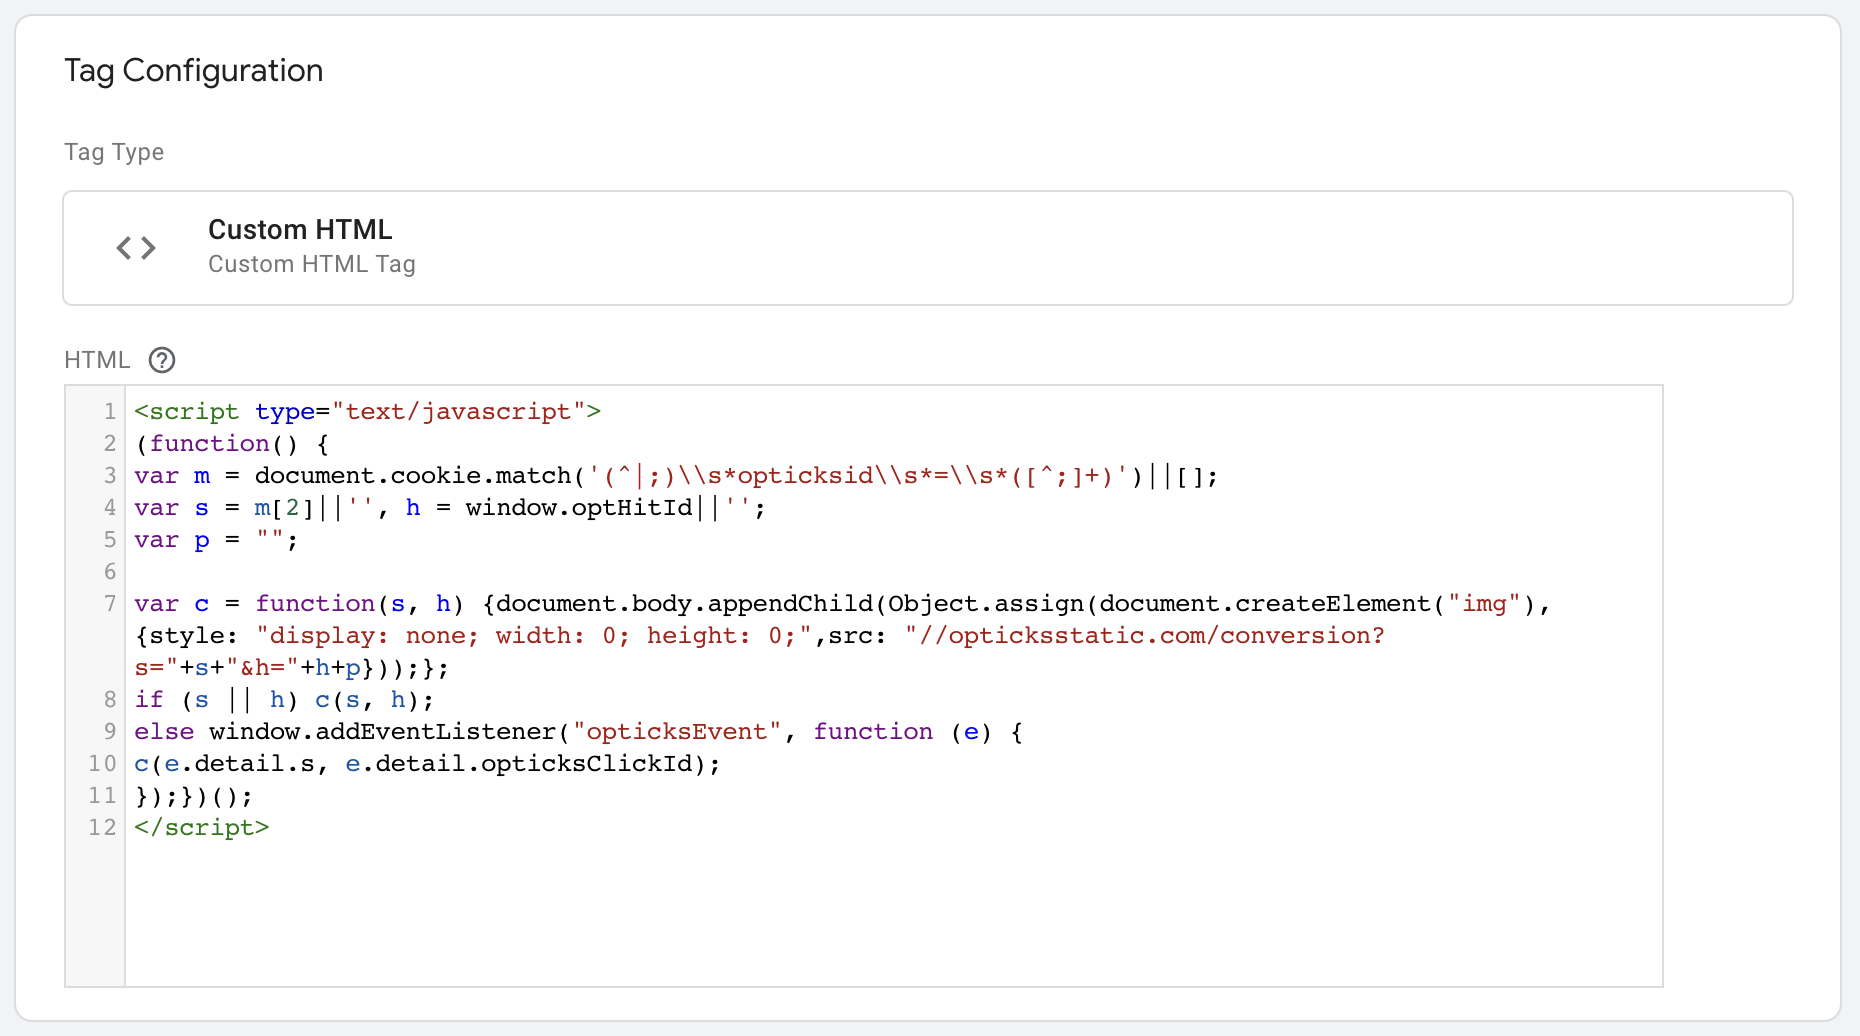
This is the code you have to put in this tag:
<script type="text/javascript">
(function() {
var m = document.cookie.match('(^|;)\\s*opticksid\\s*=\\s*([^;]+)')||[];
var s = m[2]||'', h = window.optHitId||'';
var p = "";
var c = function(s, h) {document.body.appendChild(Object.assign(document.createElement("img"), {style: "display: none; width: 0; height: 0;",src: "//opticksstatic.com/conversion?s="+s+"&h="+h+p}));};
if (s || h) c(s, h);
else window.addEventListener("opticksEvent", function (e) {
c(e.detail.s, e.detail.opticksClickId);
});})();
</script>
Triggering the Conversion Informing Tag
Now you need to fire the Conversion Informing tag with a trigger that works for your specific use case: after some Data Layer event, on a form submit, on a specific page load... This will depend on the implementation of your conversion page and the results you want to achieve.
Adding extra information to the conversions
When informing Opticks about the conversion, you are able to provide information for segmentation purposes. To do so, you will have to modify the javascript snippet above to add this information in the four variables available: var1, var2, var3 and var4.
We will assume that you have your information stored in two Data Layer variable called "My Info" and "My other info". In order to report this information to Opticks you need to modify the snippet line where the variable p is declared:
var p = "&var1={{My Info}}&var2={{My other info}}";
Feeding relevant data to Opticks
Opticks captures automatically the standard UTM segmentation variables and other common click identifiers like Google click id.
Our technology also captures all parameters present in the URL of the landing page where the OpticksJS Snippet loads.
Please inform your Customer Engineer or Custom Success Manager about the variables in your URLs you would like to use in Opticks to segment your data. Opticks can map those variables internally to Opticks custom variables so you can use them in your Opticks analytics to segment data easily.